Create your first Auto!
In the bottom right corner, you should see a folder icon. Right Click it to create a new auto. When you see the save dialog popup, select where you want to save your auto.

You should save your autos directly inside the deploy/autos folder of your source code, so your autos are automatically deployed when your code is.
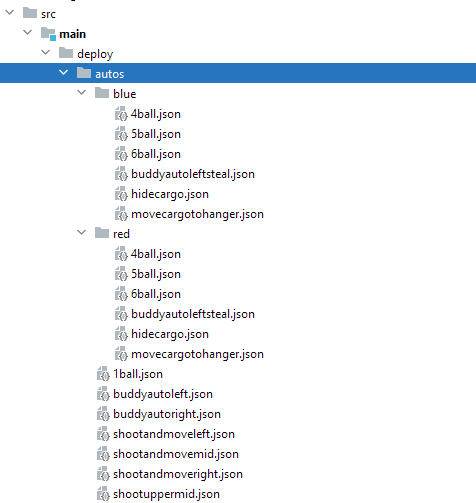
For autos that are different depending on your alliance (blue or red), you will want to place them inside a red/blue subfolder (ex: deploy/autos/blue deploy/autos/red.) The autos in both folders should have the same name so they work with the auto chooser. For autos that stay the same (regardless of alliance) you can place them in the root autos folder (ex: deploy/autos.) (This should mainly be reserved for short autos that aren't likely to be affected by slight errors on the field.)
Here's an example of our directory structure:
We also recommend that you save your autos in a Version Control System directory and commit changes to it like you commit changes to your code.
We'll be creating an auto similar to the 5-ball auto that we ran at our competitions which can be seen here (We'll make some changes to highlight some features!
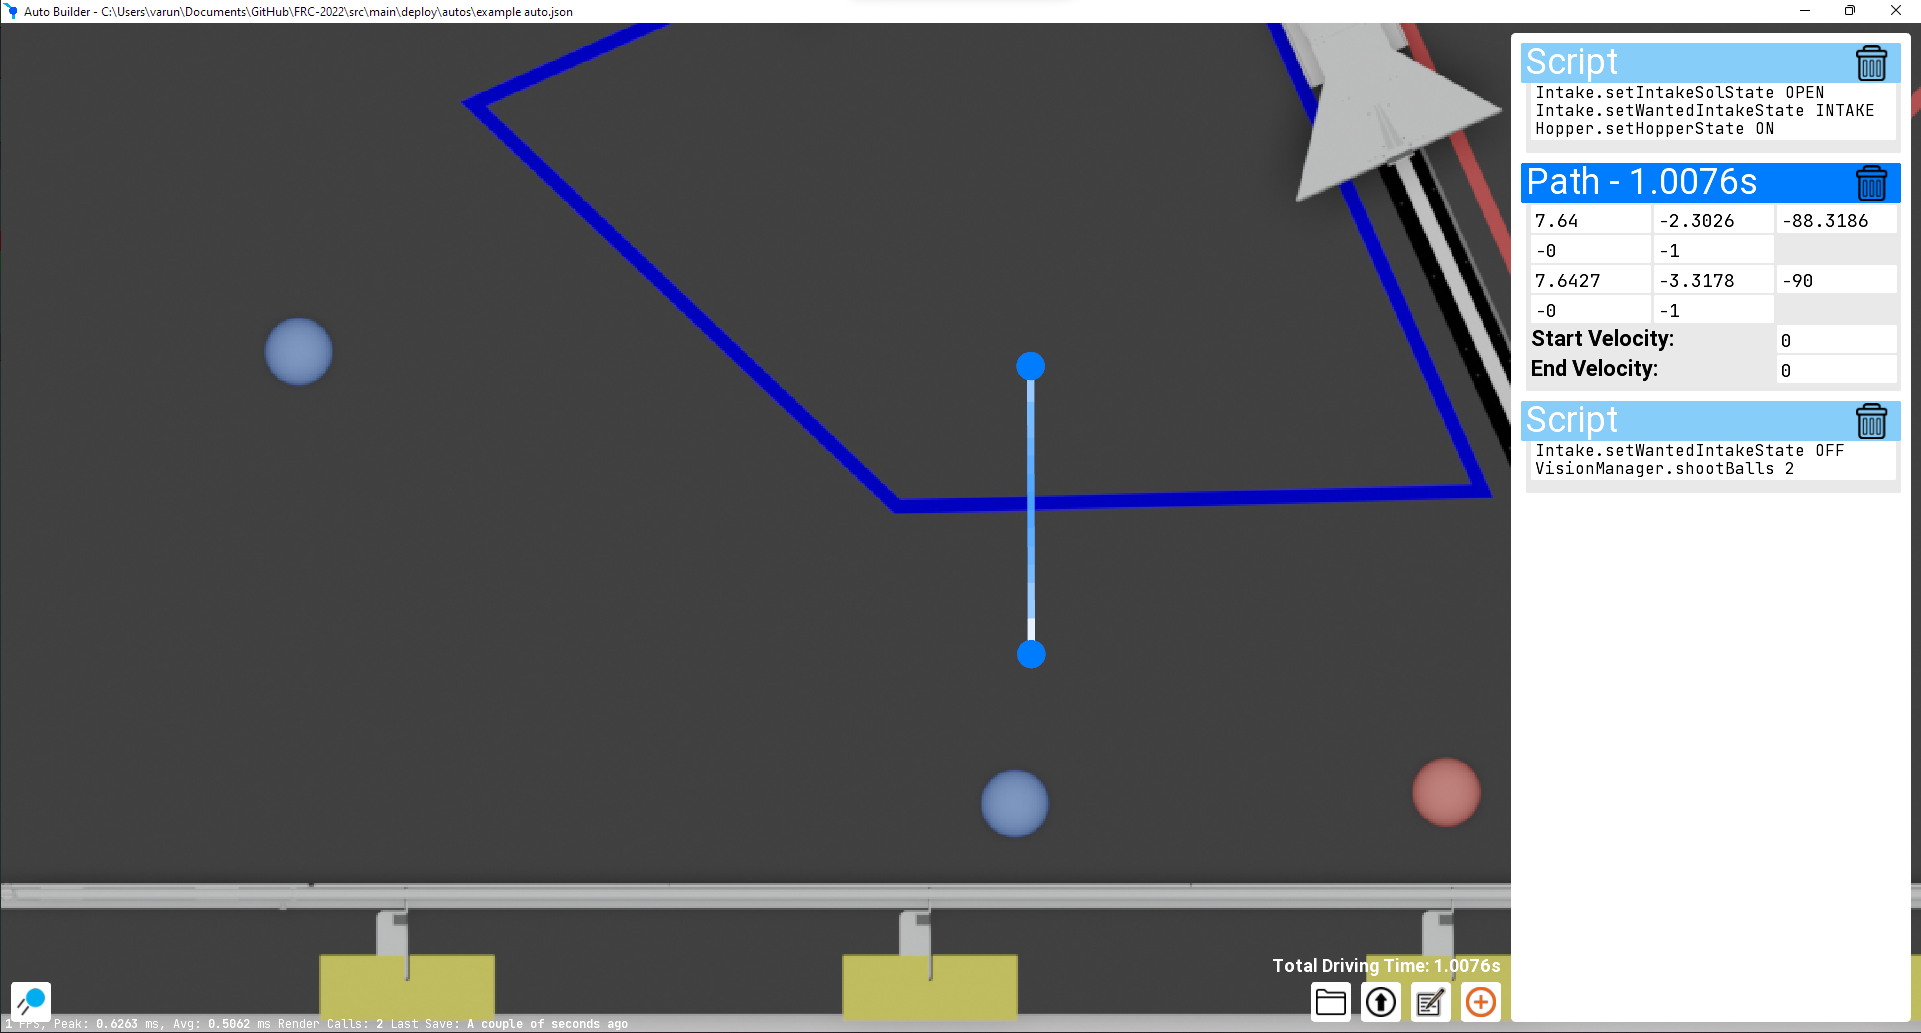
Click the plus button to add a new path.
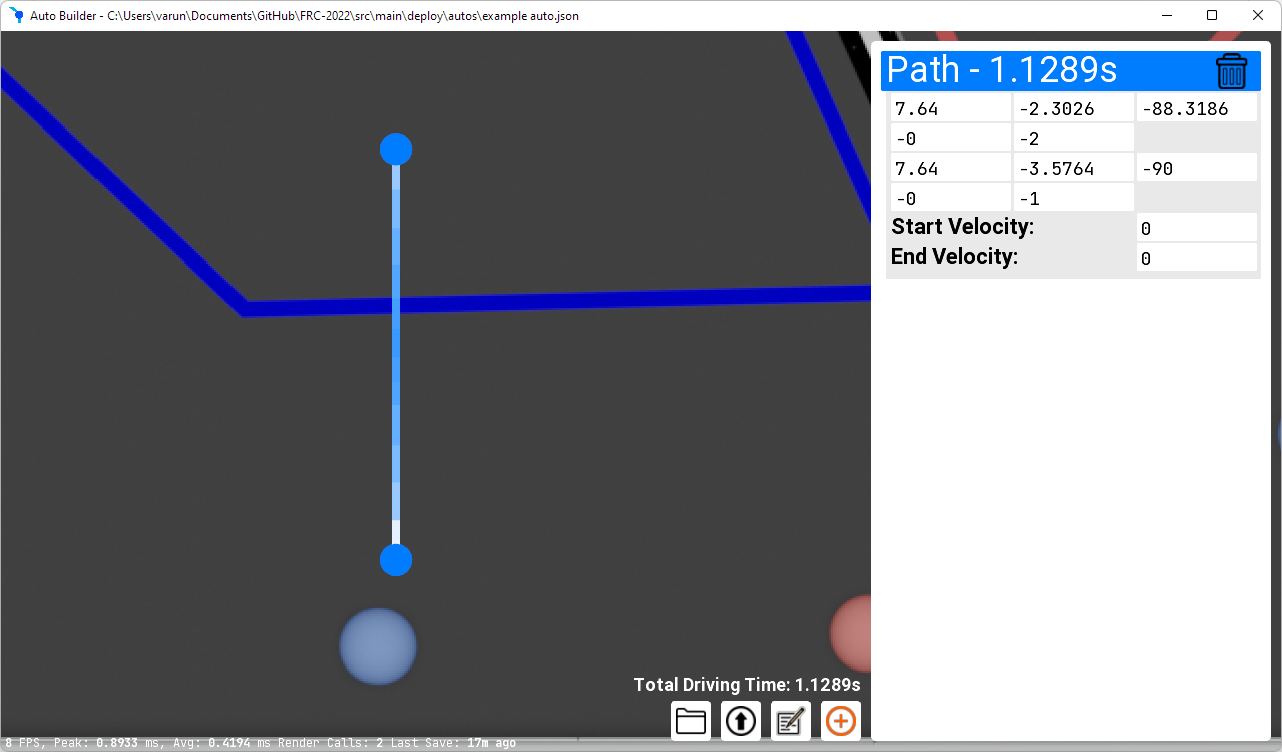
You can drag the endpoints of the path around wherever you like on the field. The blue control point represents the rotation of your robot. (The white section of the robot bounding box represents the front of your robot.) The green control point represents the control vector of the path.
Note: On non-holonomic projects you will notice that the blue control point doesn't exist as the heading is based on the direction that the robot is moving.
Another Note (Holonomic robots only): The rotation at each point doesn't represent the rotation at that point of the path. Instead, it represents the target rotation at that point. This means that the robot will only beginning to turn to that point once it crosses that point; it will not start turning to that point before that point.
Important Note: The first position and rotation of an autonomous represents the initial pose of your robot at the beginning of your autonomous period.
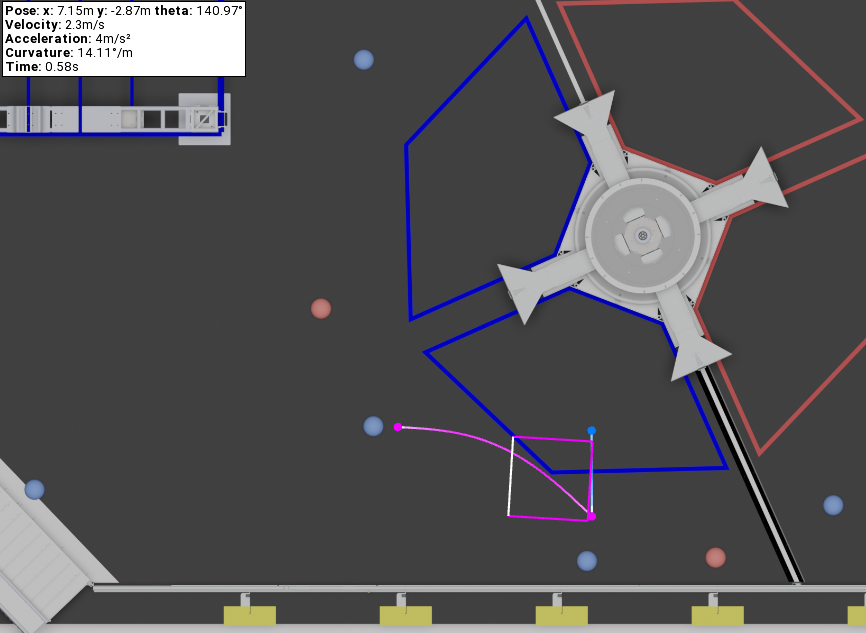
Let's begin by creating a path that looks similar to this
Instead of trying to get the control vector to be perfectly straight (handle with the green dot) we can manually set its direction by setting the X component of the control vector to 0.
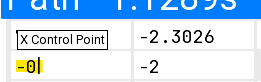
Pro Tip: You can hover over any unlabeled textbox to view what kind of values go into it.
When manually editing the values it's possible to enter invalid numbers. You'll mainly get this when you input massive numbers, when you input a vector that has a length of 0 or when you have control vectors that are in a straight line with the control vectors facing opposite directions. When this happens the path won't update when you move the points around and you will get a red notification stating that the GUI Could not parametrize a malformed spline.
We can similarly add set the X position to be the same for both points to ensure that robot is traveling in a straight line
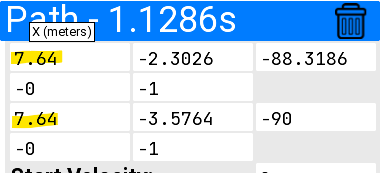
Every 2 rows represent one point on the path.

From right to left, top to bottom, each point has 5 boxes (Note: The rotation box is linked to the direction of the control vector in non-holonomic mode): X Position Meters, Y Position Meters, Rotation (degrees), X Control Point, Y Control Point.
It wasn't actually necessary to manually set all those values. 99% of the time just eyeballing should fine. I mainly went over all of this to explain everything.
Ensure you've generated the data the AutoBuilder GUI needs before proceeding
We've now made our robot move from its starting position and to where it can pick up the next ball. We still need to tell the robot to open the intake, run the intake/hopper, and shoot the balls.
Please read this if you haven't already (Adding a script step) (It may not scroll to the correct because of the gifs loading, sorry!)
To add a Script Block press
 .
.
We want this script block to execute before the path runs so, we'll drag it (click and hold the colored header) and move it above the path. If the block becomes closed, you can click the colored header again to reopen it.
In our code we have an Intake subsytem and a Hopper subsystem that both need to be turned on in order for the intake to properly work.
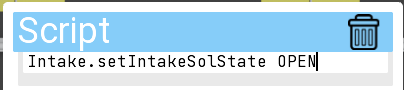
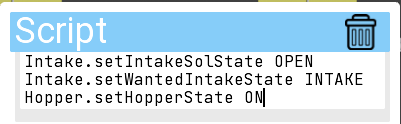
Our intake subsystem's name is Intake so we'll call Intake.<method to set intake sol state> <arg>. In our code this ends up being Intake.setIntakeSolState OPEN with setIntakeSolState being the method being called and OPEN being an enum that is taken as a method parameter.
After its all typed out it looks like this
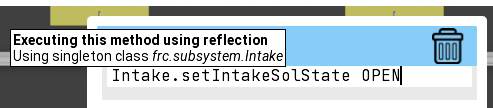
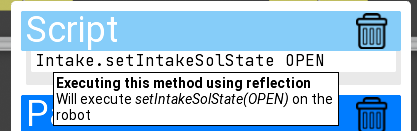
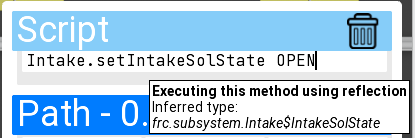
If we hover over the text we can also see some additional information about the method being executed:
Here's the corresponding code in Intake.java that's being run:
    public enum IntakeSolState {
        OPEN, CLOSE
    }

    public synchronized void setIntakeSolState(IntakeSolState intakeSolState) {
        SmartDashboard.putString("Intake State", intakeSolState.toString());
        switch (intakeSolState) {
            case OPEN:
                if (Timer.getFPGATimestamp() + Constants.INTAKE_OPEN_TIME < allowIntakeRunTime) {
                    allowIntakeRunTime = Timer.getFPGATimestamp() + Constants.INTAKE_OPEN_TIME;
                }
                intakeSol.set(true);
                break;
            case CLOSE:
                intakeSol.set(false);
                allowIntakeRunTime = Double.MAX_VALUE;
        }
    }
We also need to turn on the Intake and Hopper. After doing this, our Script Block ends up looking like this.
Please excuse our naming conventions (or lack thereof).
Let's assume we have a command to run to open and run our intake and that our hopper turns on automatically.
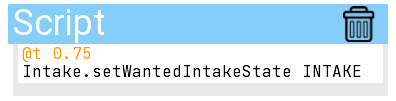
In this case, we just need to call the command to open our intake, which ends up looking like this:

That's really it! The AutoBuilder will now execute the command and our robot will open and run the intake, and the hopper will automatically turn on.
In order to shoot balls, we created a blocking method in our robot code that aims our robot and set the hood angle + flywheel speed to shoot balls. It then waits the correct amount of time for all the balls to fire and the continues.
Unfortunately, this it's only possible to program autos with blocking functions if your autos are running asynchronously from your robot code. (Otherwise you will end up stalling your entire robot code!) To get around this, when a script command is executed, it checks if the returned value is a Boolean. If it is the code will call that method every 20ms until the method returns true.
To program a shoot method this way you would have a setup function that takes the shoot duration (or number of balls to shoot), hood angle, and shooter speed (If applicable) and sets them to fields to be used by the next function.
You would then have a tickShooter/updateShooter method that has no arguments. It would take the fields set by the previous method and set the flywheel speed, hood angle, and turn the robot towards the target. It would then return false until it was done shooting where it would return true. Once it returns true the auto will continue.
Or you could ignore the last 3 paragraphs and stall your entire robot code (which would probably work fine, but isn't something you want to do if you can avoid it!)
Since our code runs autonomous commands asynchronously, we'll just execute a single asynchronous command that just blocks the auto thread. We'll place this in a script block that runs after our path. We'll also turn off our intake before we start shooting.
Caution: Do NOT catch any interrupted exceptions if you're sleeping etc., just have your method throw the interrupted exception. The code executing your method will catch the exception for you. The exception is used to kill the auto when it is ended early. (Like when you disable the robot before the auto is completed). If you must catch it for some reason, be sure to rethrow it!
Likewise if you have any while/for loops in methods being executed by the auto you need to check if the current thread has been interrupted and throw an interrupted exception if it is! The easiest way to do this is to add a short Thead.sleep() to your loops or you can add if (Thread.interrupted()) throw new InterruptedException();
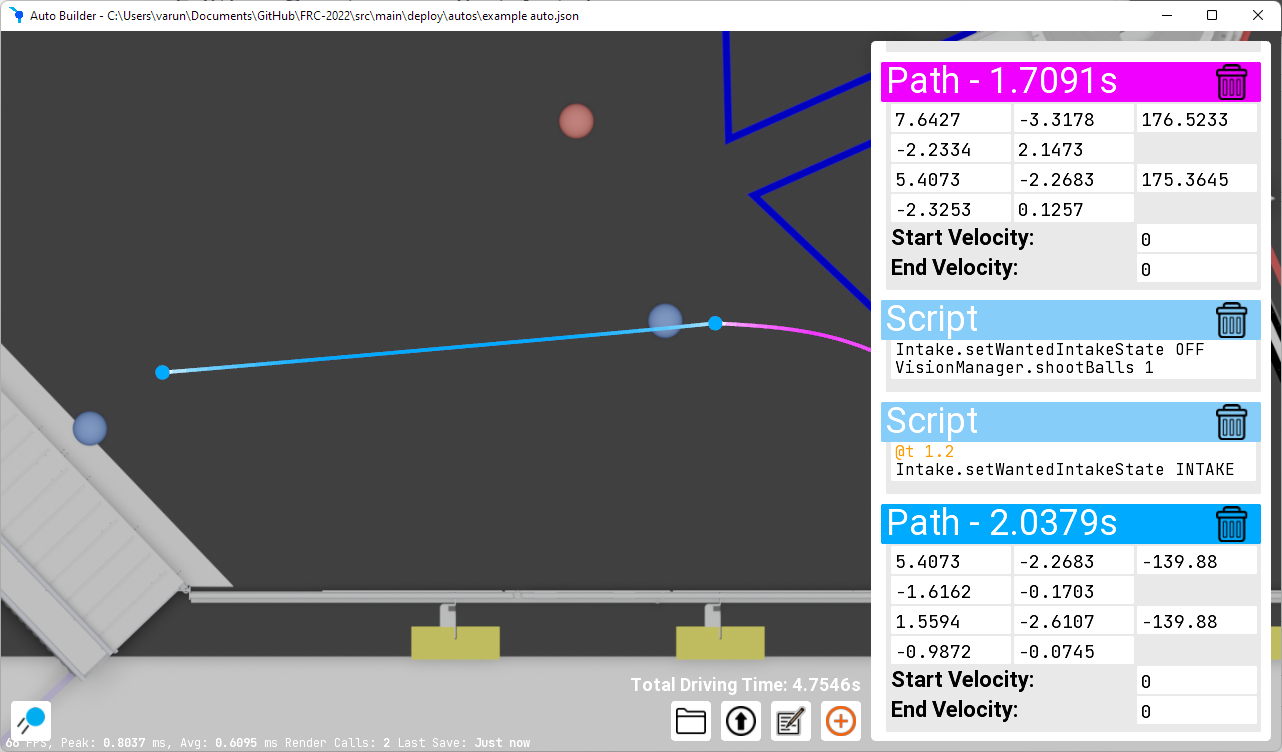
To keep you updated, here's how our entire autonomous timeline looks so far:
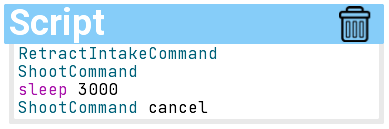
Let's assume that we have a shoot command that starts our shooter's flywheel and turns on our feeder wheel once the flywheel is up to speed. We'll also assume that this Command will run indefinitely unless canceled.
We'll start by closing our intake (which should also stop the intake motor).
To shoot the balls, we'll first have the robot start running the Shoot Command. We'll then wait for a few seconds for the robot to shoot it and then cancel the Command.
(Ensure that you don't have the shoot command annotated with @RequireWait. Since the command continues indefinitely, the Auto would get stuck at this point. You would use the @RequireWait annotation if your shoot command automatically ended by itself once it was done shooting.)
By typing cancel after a Command, we're telling the AutoBuilder to cancel that Command if it is still running.
We'll then add another path that will pick up the 3rd ball. After that we'll shoot this one ball using the method from above.
Remember: On holonomic drivebases, the defined rotation is only the target rotation at that point! The robot will not start rotating to that setpoint until is has passed that point!

To connect paths together, drag the beginning of a path to the end of the path before it. Then let go of the path and click again to connect them together. Once you do this, the paths will remain connected together when you drag that point.

You can easily delay a script block to run while your robot is driving by placing a @time or @percent at the beginning of a script block. (@t, @p, and @% work as shorthand versions of the aforementioned tags.)
The syntax should be pretty self-explanatory after seeing a few examples:


Once you add a delay to a path, it will execute with the subsequent trajectory that executes. (Note: The time delay is relative to the start of that path.)
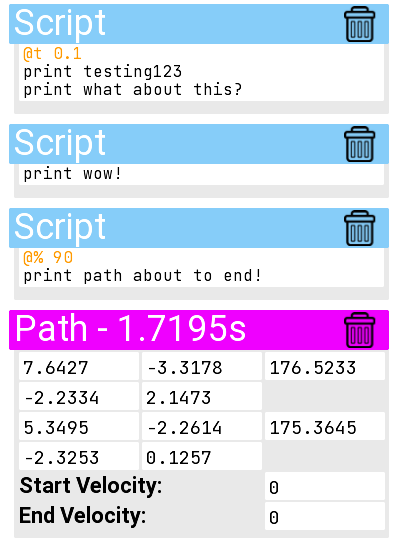
In this example, wow! will be printed before the path starts running.
After 0.1s of the path running, testing123 will be printed along with what about this?
After the path is 90% completed, path about to end! will be printed.
It's probably easiest to delay the script by using the time delay (the percent completion ones also get converted to time delays internally as well.) We can hover over a portion of the path to get a popup of the wanted state of the robot at that point. That information also includes the time of the path of that point which you can use as your delay.
In our case, we want to turn the intake back on after driving the second path for a bit.
To do this, we'll add the following script before our second path runs:
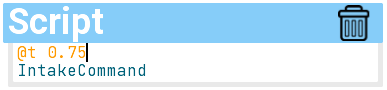
For a command-based robot, we'd instead write:
To grab the 4th and 5th ball, we'll make the robot travel in a straight line to the human player station. We'll also turn the intake back on once we reach closer to the 4th ball.
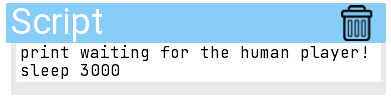
At this point, we need to have the robot wait for a bit before continuing. To do this, we can make use of the two built-in methods which are print and sleep.
To the end of our auto, we'll add:
After this, we can move the robot closer to the goal and shoot the final 2 balls. We'll also close and turn off the intake in the middle of the path.
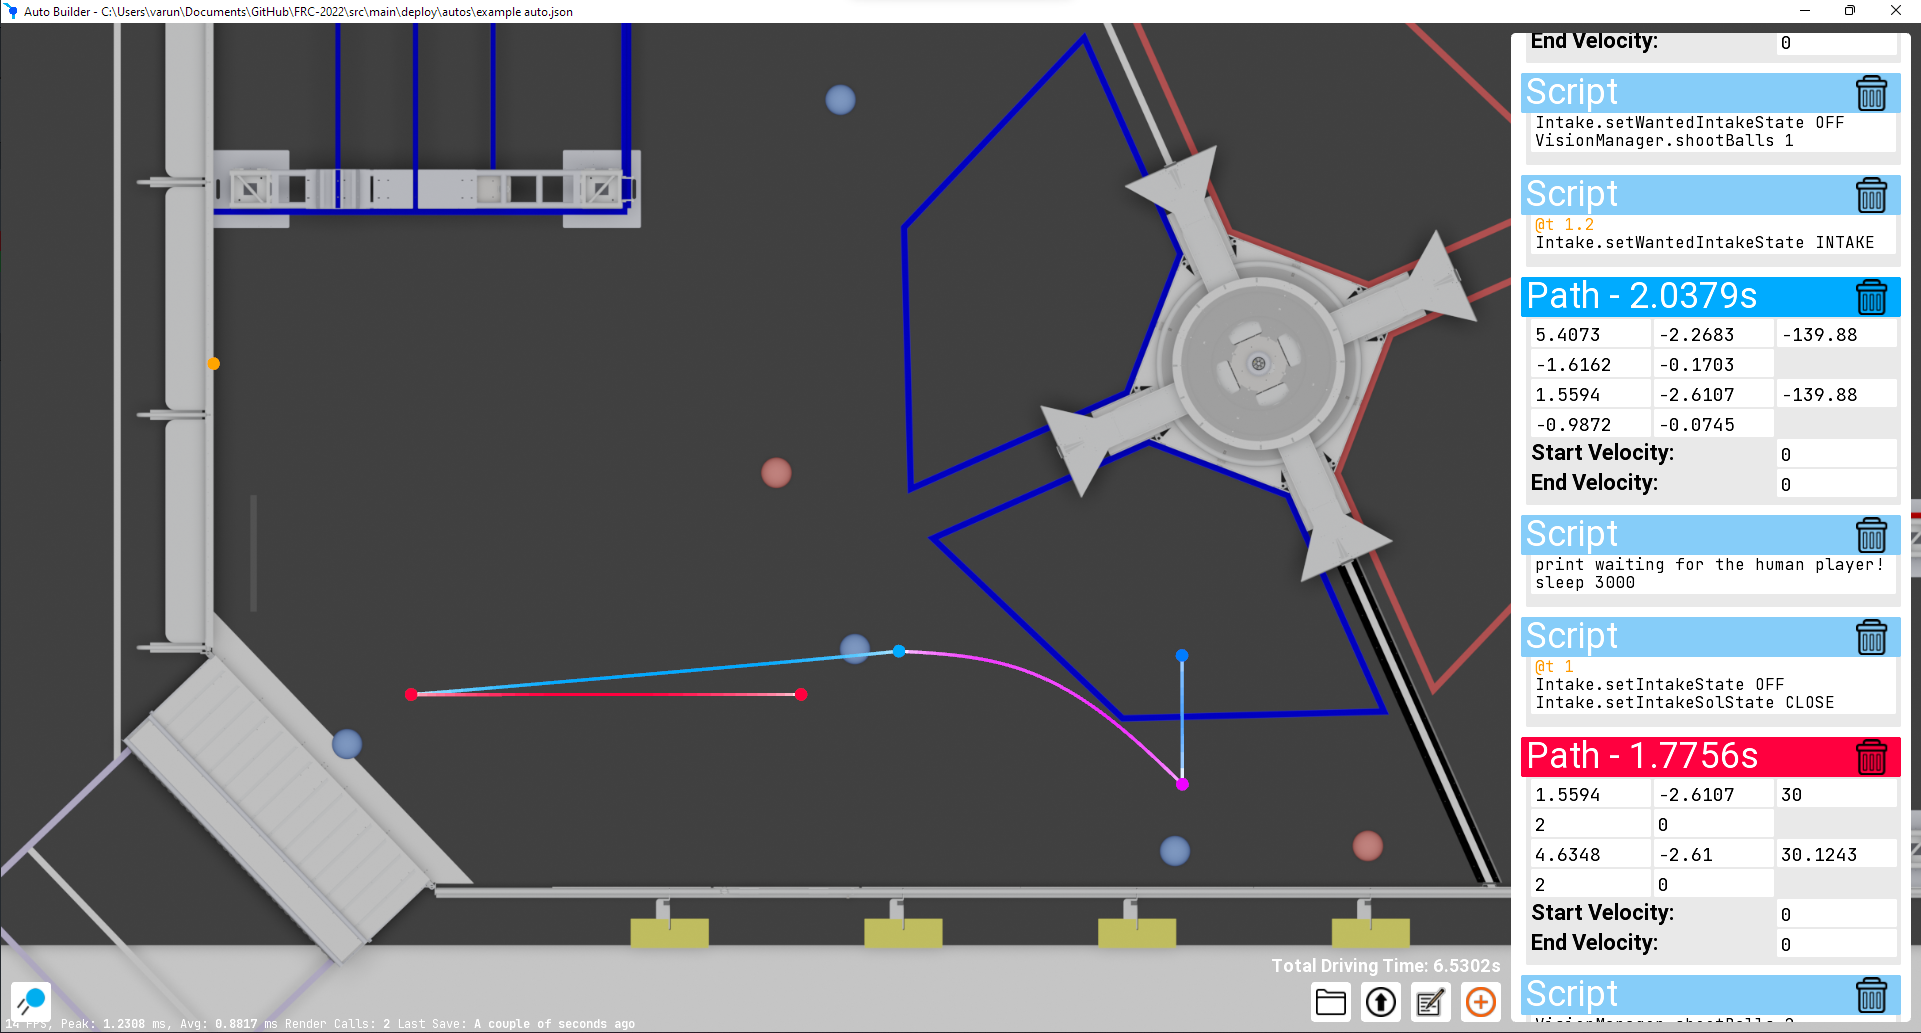
By now, you've probably noticed the total driving time in the bottom right corner. This can be helpful when making adjustments as it allows you to see if the changes you're making are speeding things up. Keep in mind that this doesn't take the execution time of the script blocks into account.

Make sure you enable Networktables if you disabled it!
Simply press the
 button to upload the auto to your robot. If you've properly implemented the robot side, you should see some messages appear at the top of the screen as the robot loads the auto and when it's ready to run (usually only a couple of seconds maximum).
Once the auto finishes loading, you can simply enable autonomous inside your driver station, and the auto should run!
If you've set up the path preview, it should also appear as the robot drives around (in teleop and autonomous). You can use this path that's overlaid to make adjustments as needed.
If you need to clear the path that the robot has drawn, press ctrl + backspace/delete:
TODO: add a picture of this
Assuming that you're using the recommended folder structure you should be able to deploy your code and everything should just work. (If you've previously uploaded an auto to your robot by pressing the deploy button in the GUI, it will override the selected auto in your auto selector. Restart the GUI before you deploy your code if this is the case!) If your autos aren't inside the auto directory of your deploy folder you will need to copy them there and then deploy your code.